MAWS2113E


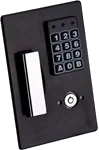
MAWS Electronic Lock
Safes with this Lock:

IMPORTANT
To ensure the safety of you belongings, you Must change the factory set Master Code to Your own unique code immediately!
Always perform this operation with the door open
Before closing the door, make sure all the changes are correct.
Insert : 4 AA Batteries into the compartment located inside the door
Enter : [Factory set Code: # – x – x – x – A]
Green light will appear for 5 seconds
Please see your user manual for the factory set Codes or contact Tech Support.
Pull the handle to open door while the Green light is still on
IMPORTANT:
If you misplaced your code or if the batteries die while the safe is in the locked position, use the override key that is included with your safe.
Do NOT store the override keys inside the safe.
[For detailed instructions, see Safe Installation section]
Choose a location free of plumbing & electrical wires
Adjust & secure the telescoping back
Locate studs
Safe is designed to fit between standard 16″ center-to-center studs
Cut out a 21 1⁄8″ high x 14″ wide section in your wall
Remove door [optional]
[See Removing the Door section]
Mark & drill 1⁄16″ – 1⁄8″ pilot holes into studs
Anchor your wall safe
Install shelf extensions if needed
IMPORTANT:
If you misplaced your code or if the batteries die while the safe is in the locked position, use the override key that is included with your safe.
Do NOT store the override keys inside the safe.
For your convenience, we have engineered a manual override key system for your safe. If you forgot or misplaced your code or if the batteries die, use the override keys to manually open your safe.
Remove the plastic cap
[Located below the keypad]
Insert the override key & turn counter-clockwise
Pull handle to open safe
IMPORTANT:
Do NOT store the override keys inside the safe.
Enter : Code – A
Green light will appear
Before the Green light disappears: Pull handle to open door
To lock safe, close door & push handle back to the close position
Make sure your safe is locked before walking away!
Valid Code : The Green light will appear for 5 seconds
Invalid Code : Keypad will Beep 6 times while the Orange light appears
If an incorrect code is entered 3 times consecutively, a Lock-Out Penalty will be activated. During this lockout period, the keypad will not respond & the Orange light will flash every second until the lockout period is over. The lockout period will last for approximately 3 minutes.
Open the safe & locate the red program button
[Located on the inside of the door]
Press the red program button & release; keypad will Beep once & the Orange light will appear for 10-15 seconds
Before the Orange light disappears – Enter : New Code – B
Code can be 3-8 digits
Valid Entry : Keypad will Beep 4 times
If a mistake has been made, wait for the Orange light to disappear & repeat steps 1-3
IMPORTANT:
Test your New Code several times before closing door. Keep a record of your code.
The interior light is controlled by a red switch located on the top edge on the inside of the door panel.
Note:
Always remember to turn the light off before closing & locking safe or it will drain batteries.
Using 6 sets of Hardware C, attach the middle section of the telescopin back first.
Keep screws loose enough so the depth can be adjusted.
Using 6 sets of Hardware B, attach the back section of the telescopin back second.
Keep screws loose enough so the depth can be adjusted.
Now that both sections have been attached, determine the maximum depth available within your wall
Adjust & secure both sections of the telescoping back to the determined depth
Do not over tighten screws
Be sure to pick a wall free of plumbing pipes & electrical wires. Use caution when cutting into drywall.
The safe is 14″ wide & is designed to fit between standard 16″ center-to-center studs
Note:
Most homes have wall framing constructed of 2×4’s &/or 2×6’s that are located 16″ from center of stud to center of stud.
Tools Required for Installation
Tape Measure
Pencil
Drill
Dry Wall Saw or Jig Saw
Framing Square/T-Square
Screwdriver [Philip’s & flathead]
Flashlight
Stud Finder
NOTE:
Instructions shown are for wood framed wall installation
Determine the approximate location of the stud for the right side of your wall safe [hinge side]
Drill or cut a large enough pilot hole to determine where the inside edge of the stud is located
Using a Framing Square/T-Square, draw a 21 1⁄8″ vertical pencil line along the inside edge of the stud. This will locate the right side [hinge side] of the safe
From the top of your drawn line, measure 14″ to the left & make a pencil mark.
Repeat this step at the bottom of your drawn line
Using a Framing Square, draw a vertical line between the pencil marks locating the left side of the safe
With the Framing Square, draw a horizontal line at the top of the 21 1⁄8″ measurement joining the 2 vertical lines.
Repeat this step at the bottom.
You now have a 14″ x 21 1⁄8″ rectangle drawn on the wall between the studs
With the Dry-Wall Saw or equivalent tool; beginning at the pilot hole, cut along the pencil lines & remove the wall section
NOTE:
The outer flange of the safe will cover the cut line & any flaws
To make the safe installation as easy as possible, remove the door. [See Removing the Door section]
Fit the wall safe within the wall cutout so that the hinge side of the safe is flush against the right stud & the front flange is flat against the wall
Mark the stud using the 4 outer slots in the front piece of the wall safe to indicate where the pilot holes need to be drilled
Remove the safe from the cutout & drill 1⁄16″ – 1⁄8″ diameter pilot holes
Now that the pilot holes have been drilled, you can fasten the safe into the wall.
Use 4 sets of Hardware D through the 4 outer slots in the front piece of the safe
Intall expandable shelves as needed
IMPORTANT:
Do not over tighten; there may be a little gap between the left stud & the safe – this is normal
Do not over tighten; there may be a little gap between the left stud & the safe – this is normalYour wall safe comes with additional shelf extensions. The shelf extensions come in 2 sizes: Large & Small.
After installing your safe within the wall, install the shelf extensions that work best with your depth. When using the larger shelves you can install the smaller shelves to add extra support beneath the large ones.
Use 2 sets of Hardware A for each shelf extension.
To make the safe installation as easy as possible, you can remove the door.
Remove the set screws located on the top & bottom hinge
Remove the bottom hinge pin by tapping it out with a wedge screwdriver
Remove the top hinge pin by tapping it out with a wedge screwdriver
Reverse steps 1-3 to reinstall door
Hold on to your Proof of Purchase [receipt/invoice]. You will need this to order keys or use the Warranty Service.
Do not open your safe if it is lying on its side, back or top. ONLY open your safe when it is in the upright position
Do not slam the door. Extreme shock can damage the lock or jam the bolt work system
Do not shut the door with the locking bolts in the locked position. This may damage the locking bolts & create problems unlocking & locking the safe
Do not overstuff contents of the safe so that the door must be forced shut. Bolt work may jam as a result.
Keep liquids away from keypad. Liquids can damage the keypad.
IF YOU ARE HAVING ANY ISSUES WITH YOUR LOCK, CHANGE YOUR BATTERIES FIRST BEFORE CONTACTING TECHNICAL SUPPORT
Please contact Tech Support at 888.381.8514 for assistance.
Live Technical Support Available Monday – Friday 8:00am – 4:30pm [Pacific Standard Time]
Click Here to view our Mesa Safe Warranty.
Click Here to view our Limited Lifetime MBF Gun Safe Warranty.